


How to install Jenkins on Ubuntu Server 20.04 and Virtual box
This tutorial is for How to install Jenkins on Ubuntu Server 20.04 and Virtual box. Jenkins is an open-source continuous integration server. I am assuming you are already familiar with Virtual box. Now Steps to Install Jenkins using Ubuntu 20.04 and Virtual box 6.1.16 Download the latest version of Ubuntu Server Create.
Download the Ubuntu Server
Open below URL and download the latest Ubuntu server. Ubuntu
Create a Virtual Machine in Virtual box
First, you have not installed and download Virtual box so download here. you can successfully install the downloaded version of Ubuntu on the Virtual machine now you just created following the instruction on the screenshot.
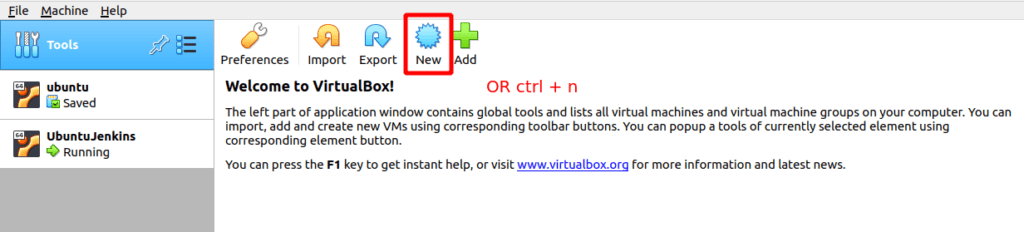
Step 1: Create a new machine
Create a new machine on left side Machine menu or select new.
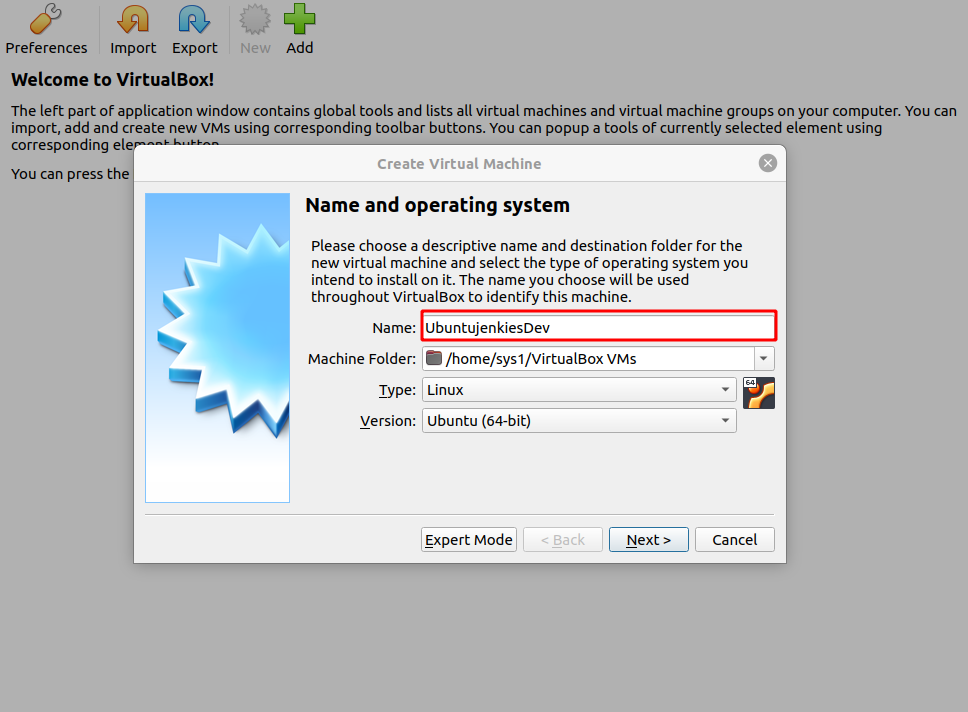
Step 2: The machine name add
Add new machine and Enter Machine. see the watch below screenshot:
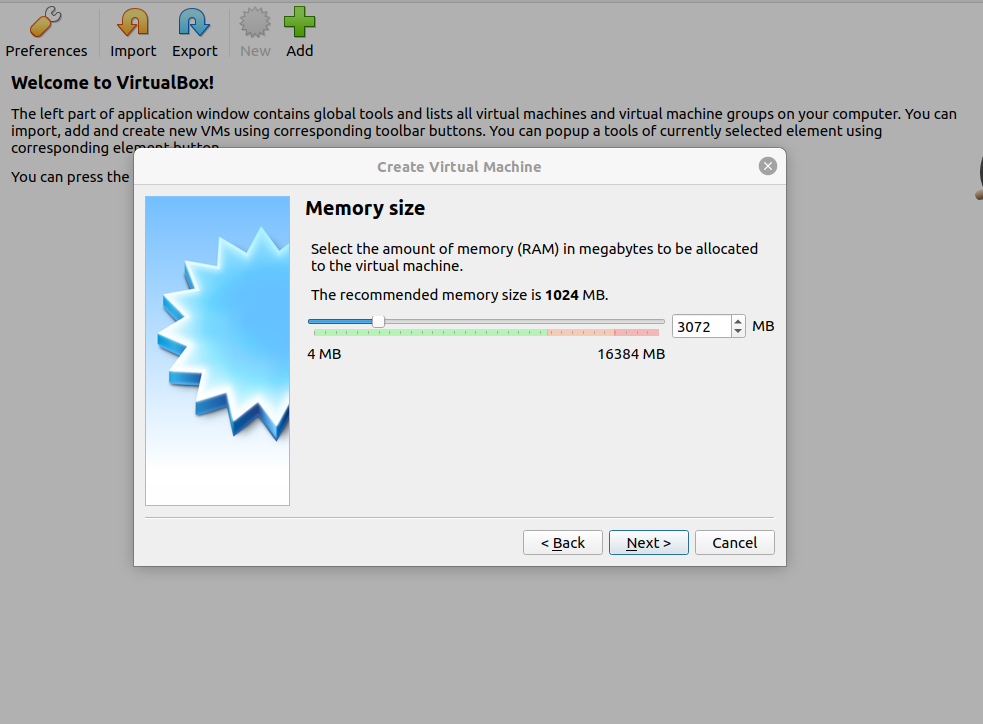
Step 3: Setup the memory on the machine
Set up the amount of memory in MB (megabyte) to be allocated to the virtual machine.
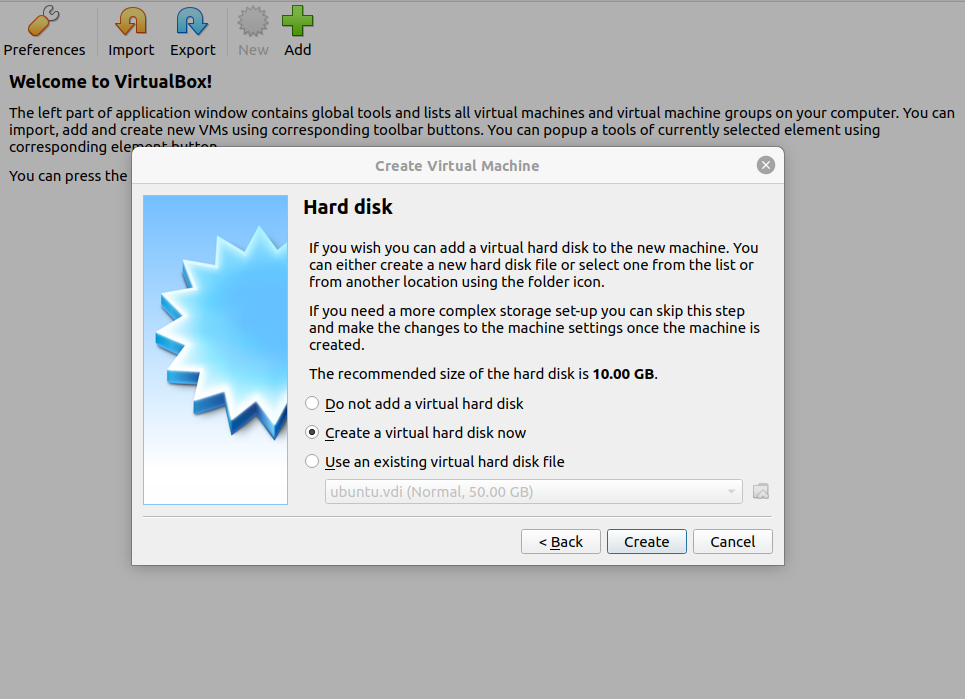
Step 4: Configuration of the hard disk
Create a virtual hard disk now if you wish you can add a virtual hard disk to the new machine.
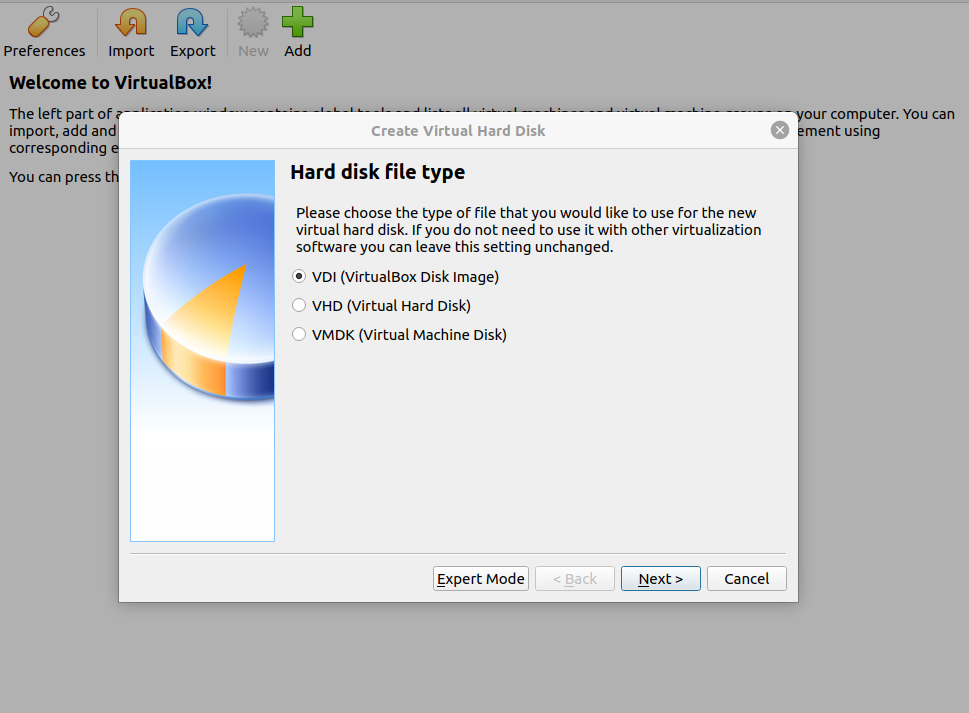
Choose the type of file that you would like to use for the new virtual hard disk.
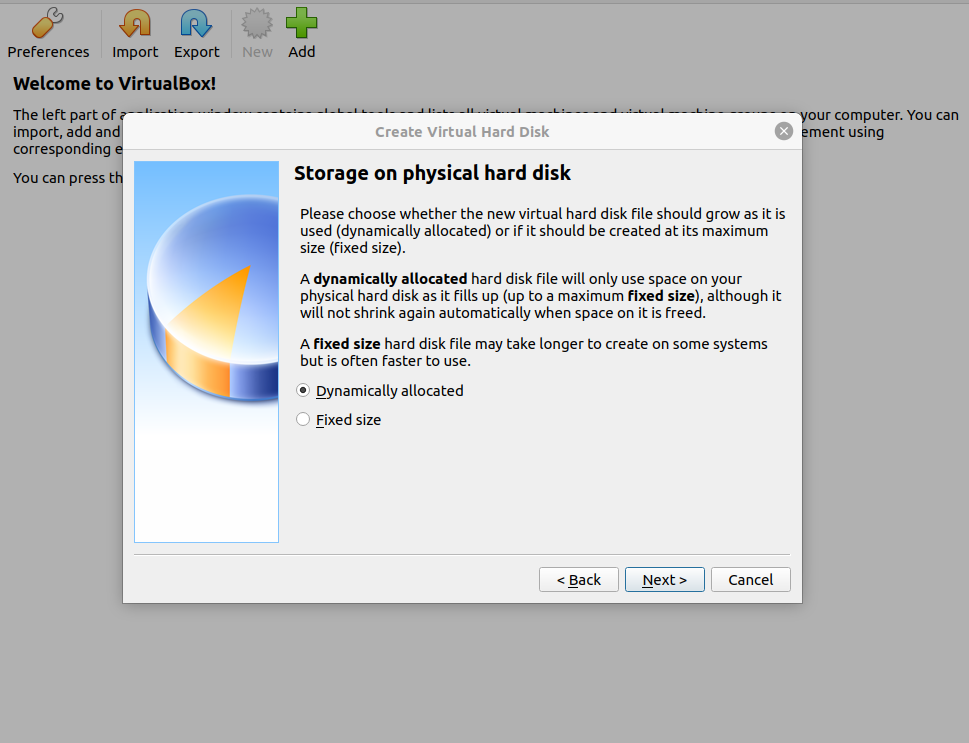
Select storage on the physical hard disk. You can select a dynamically allocated hard disk file it will use space on your physical hard disk fills ups.
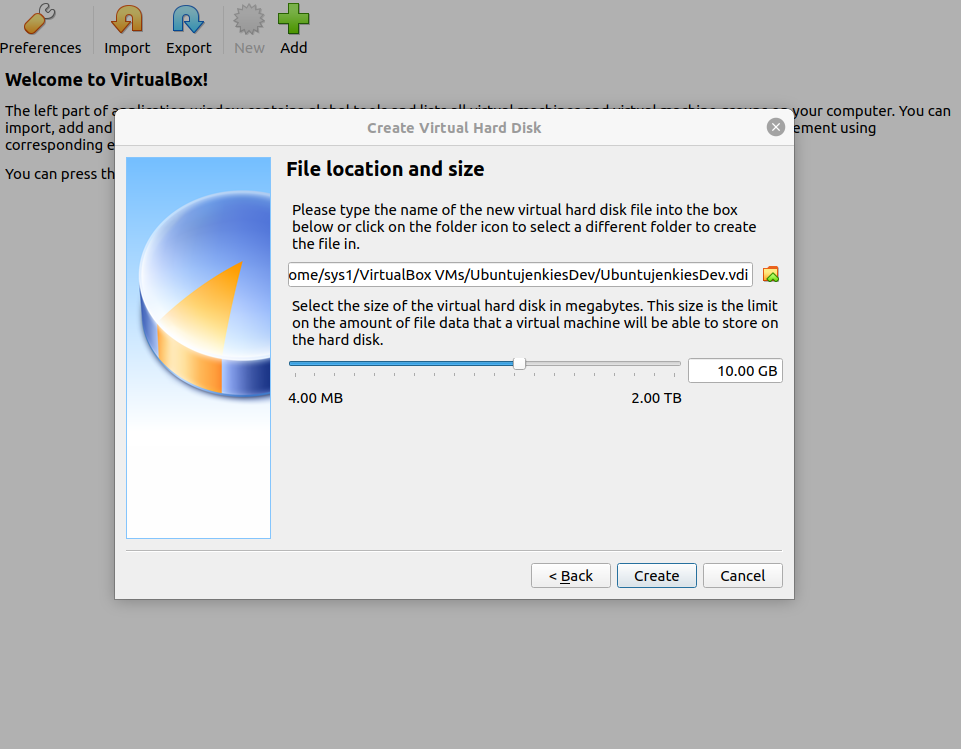
Select the virtual hard disk in MB(megabytes).
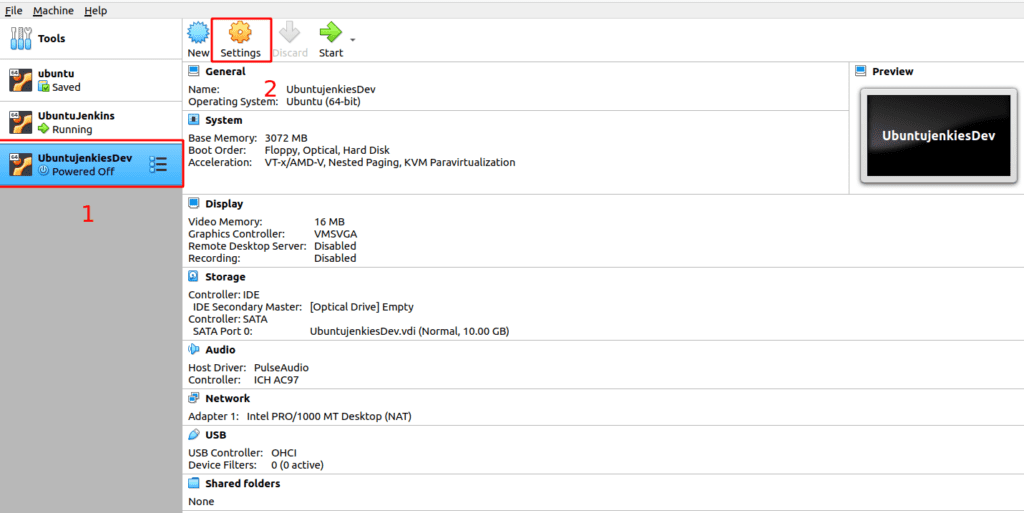
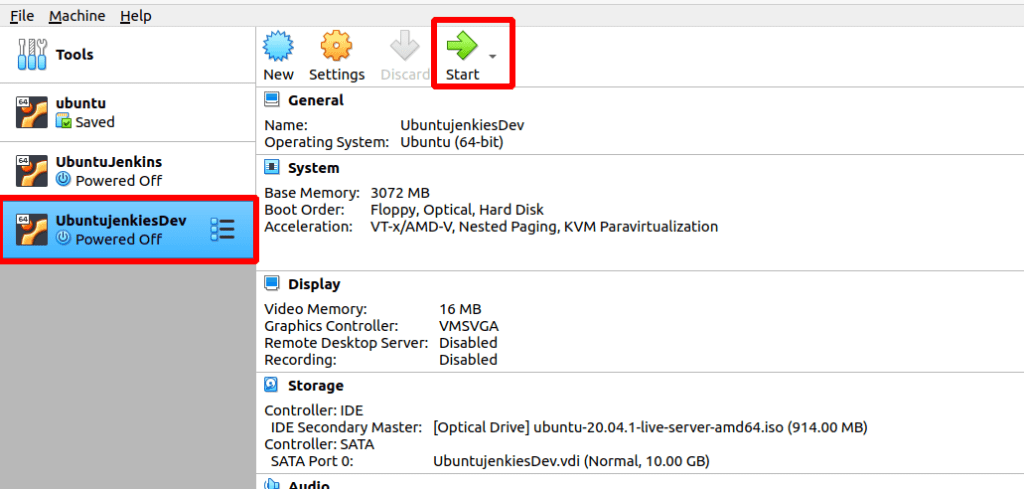
Now Virtual Machine created successfully.
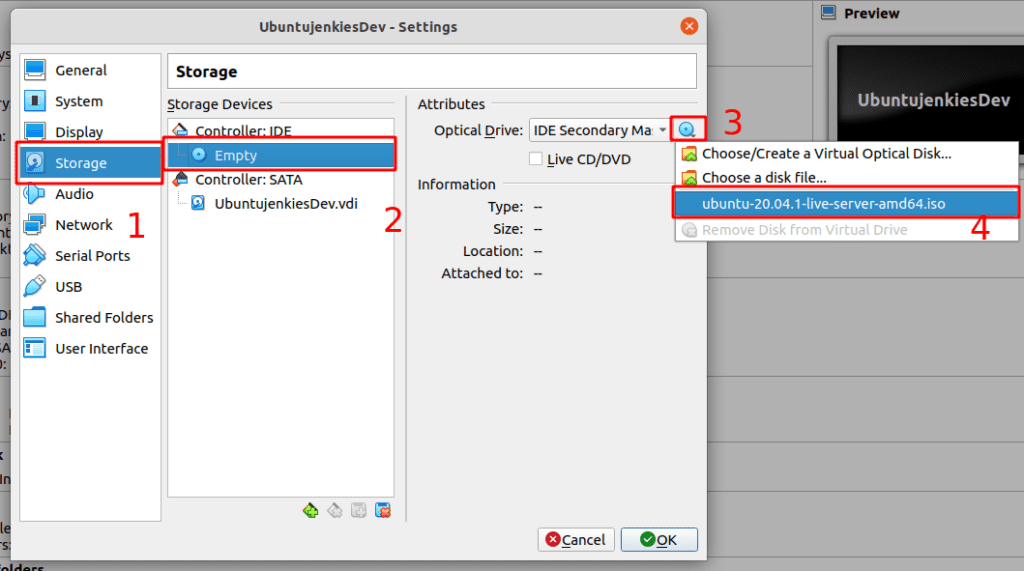
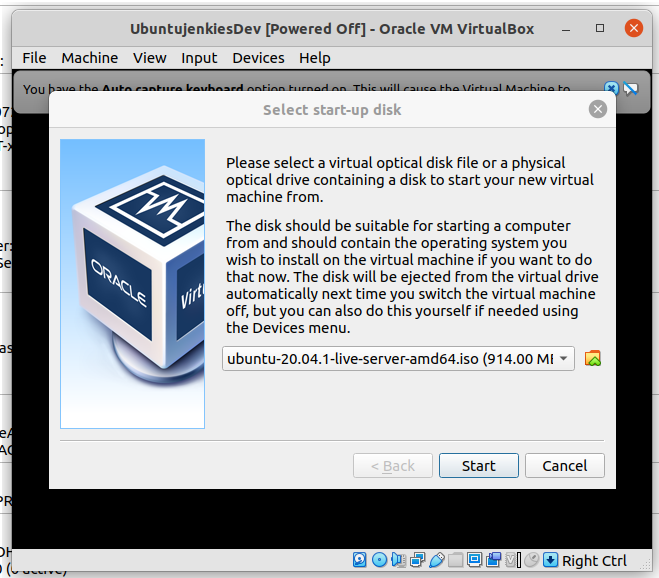
Select Ubuntu 20.04 .ISO file. Remember to attach the .ISO of Ubuntu.
Now currently creating a virtual machine is started.
Please select a virtual optical disk file containing a disk to start your new virtual machine.
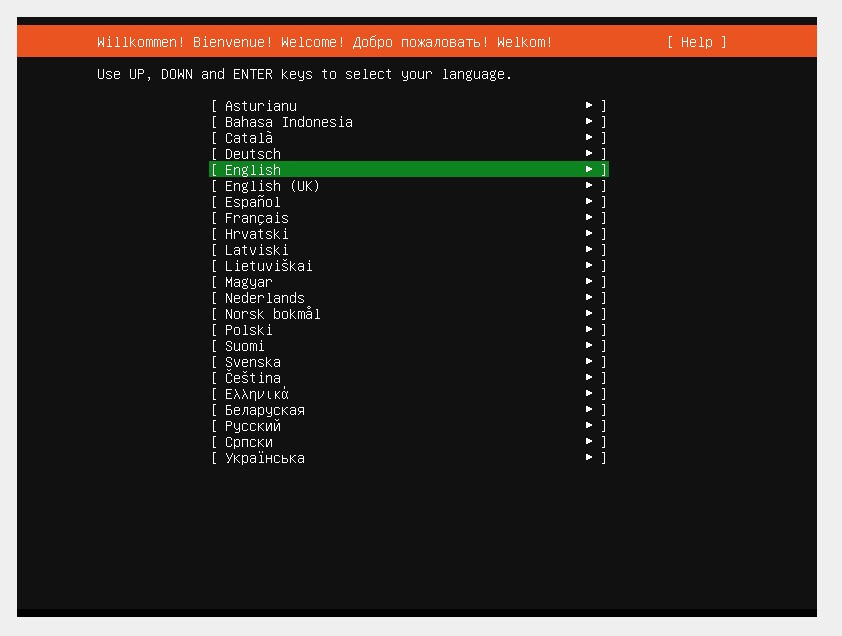
Select your language
Use the UP, DOWN Arrow, and ENTER keys to select language.
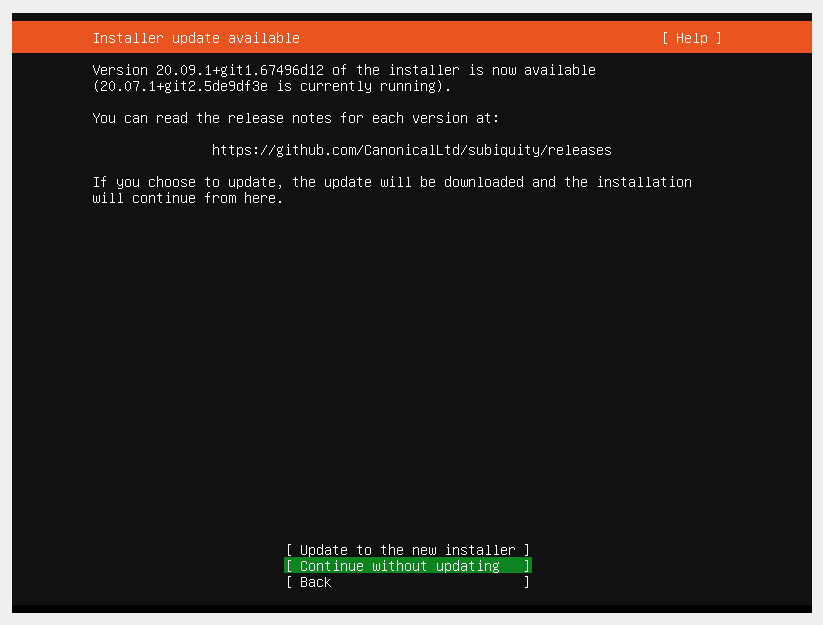
Installer update available
You have three options First is to Update to the new installer, second Continue without updating, and Back.
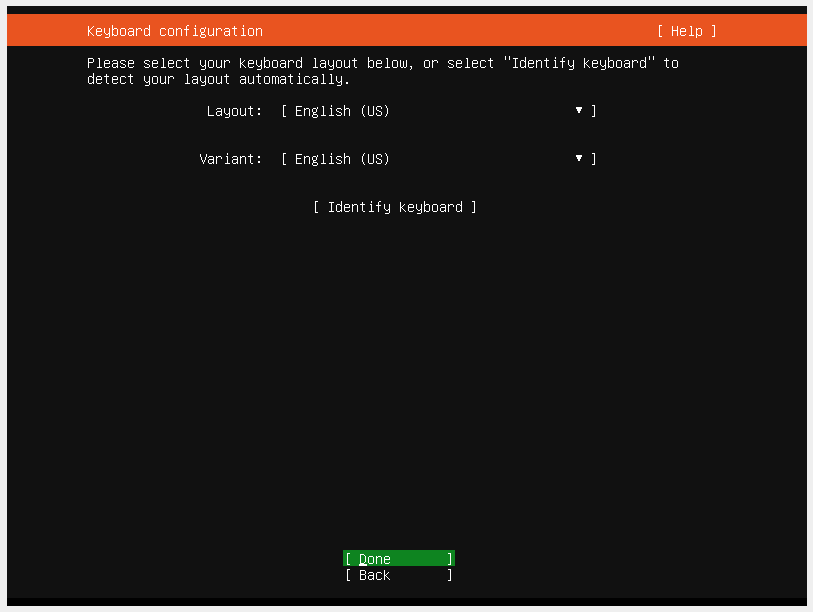
Keyboard configuration
Select your keyboard configuration layout below, and select identify keyboard to detect your automatic layout.
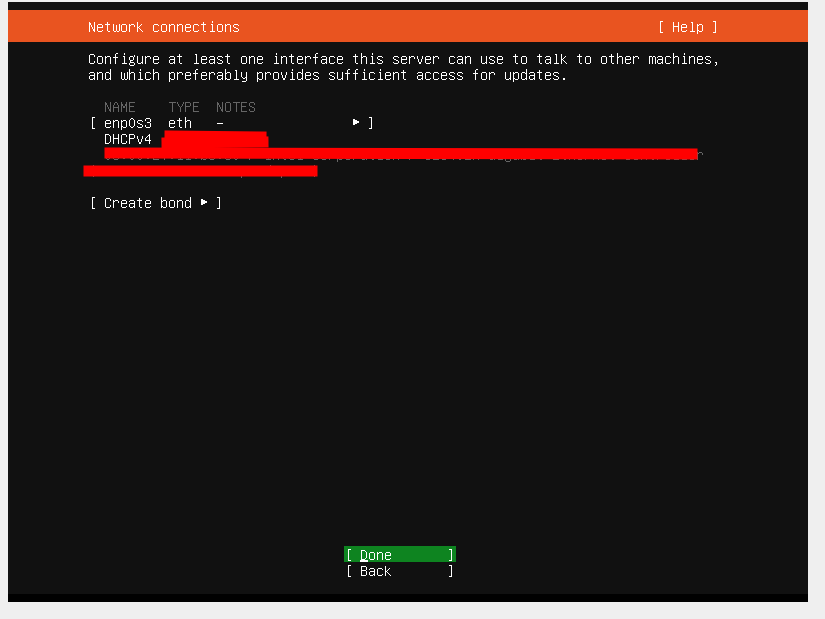
Network connections
Network connections to create and configure at leaser one interface this server can users to talk to other machines.
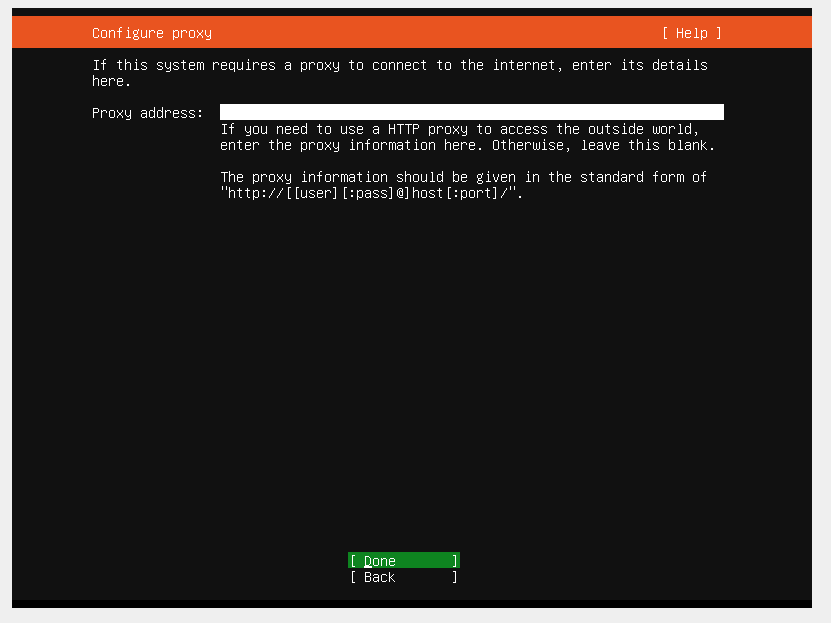
Configure proxy
You can see the proxy address. you need to use an HTTP proxy to access the outside world.
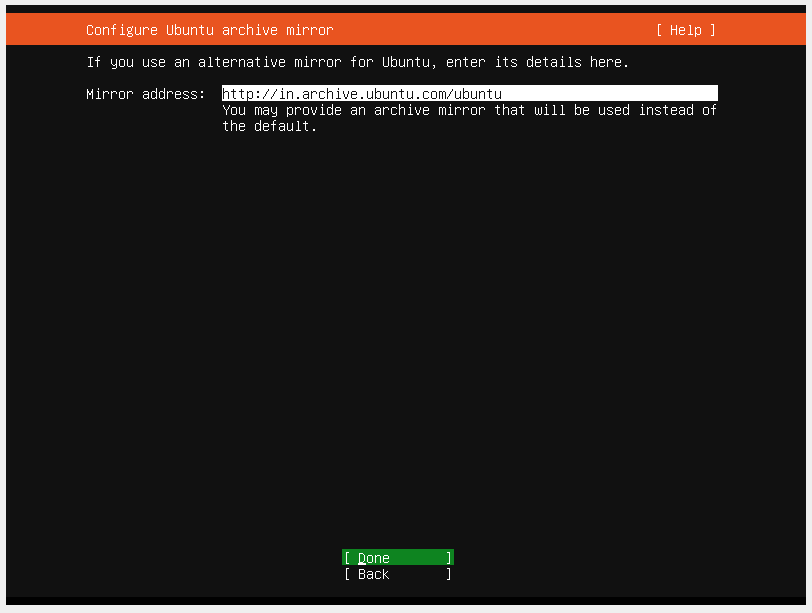
Configure the Ubuntu archive mirror
Configure Ubuntu archive mirror as an alternative mirror for Ubuntu.
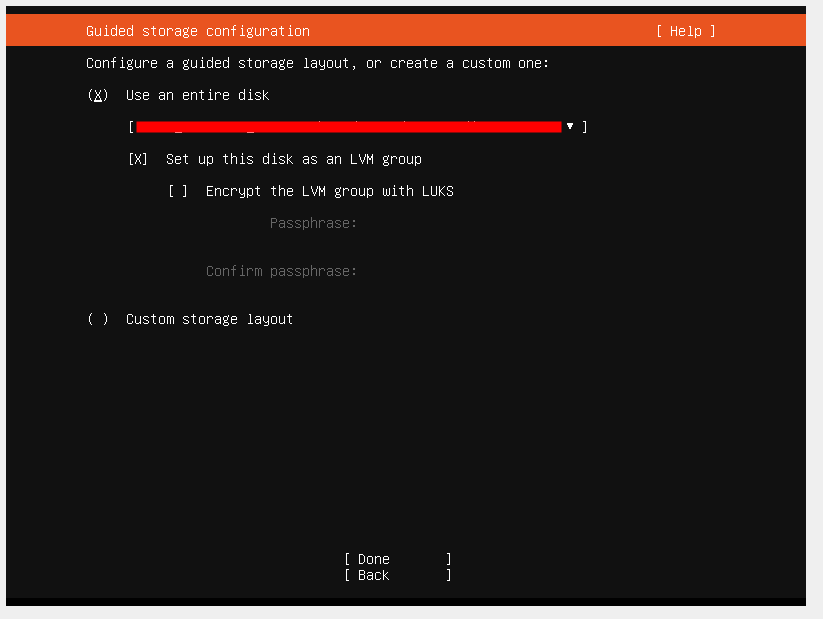
Guided storage configuration
Guided storage configuration is the layout or creating a custom one.
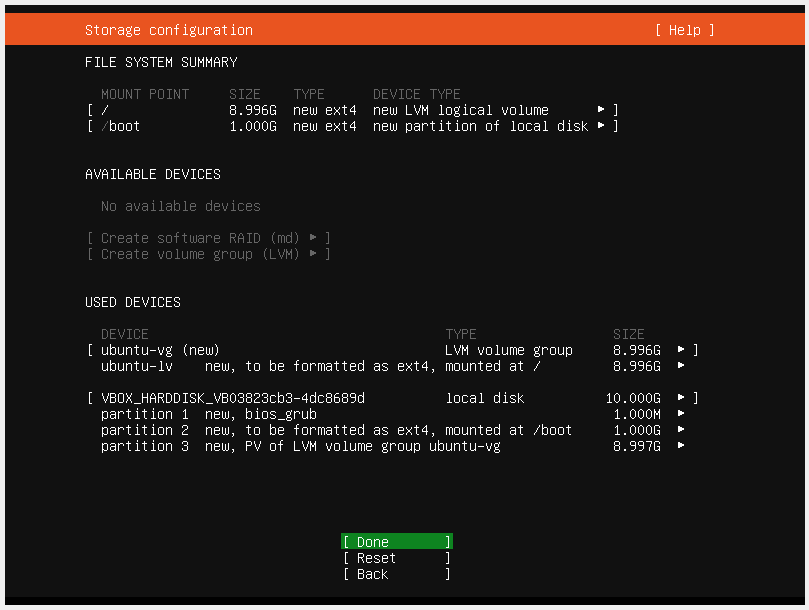
Storage configuration
Storage configuration in FILE SYSTEM SUMMARY, AVAILABLE DEVICES, And USER DEVICES.
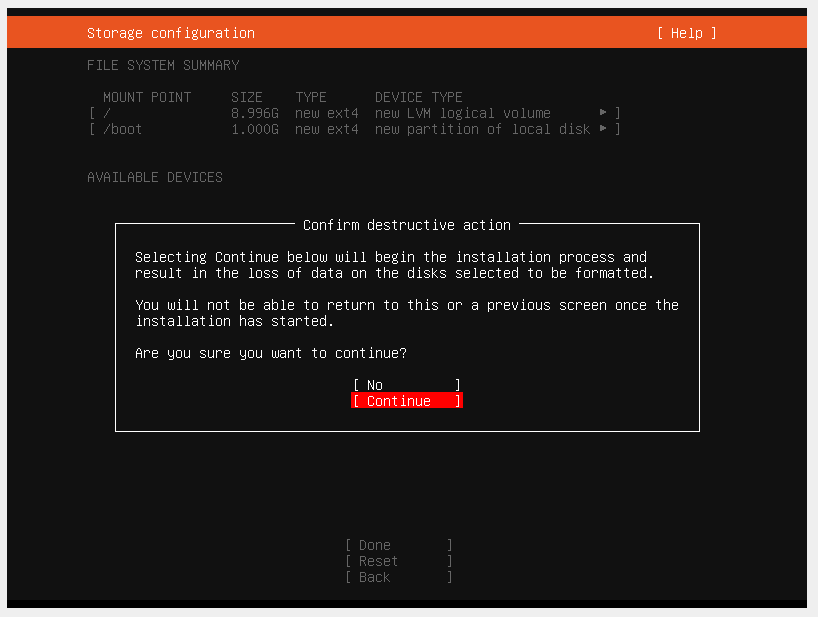
Confirm destructive action
The installation process results in the loss of data on the disks selected to be formatted.
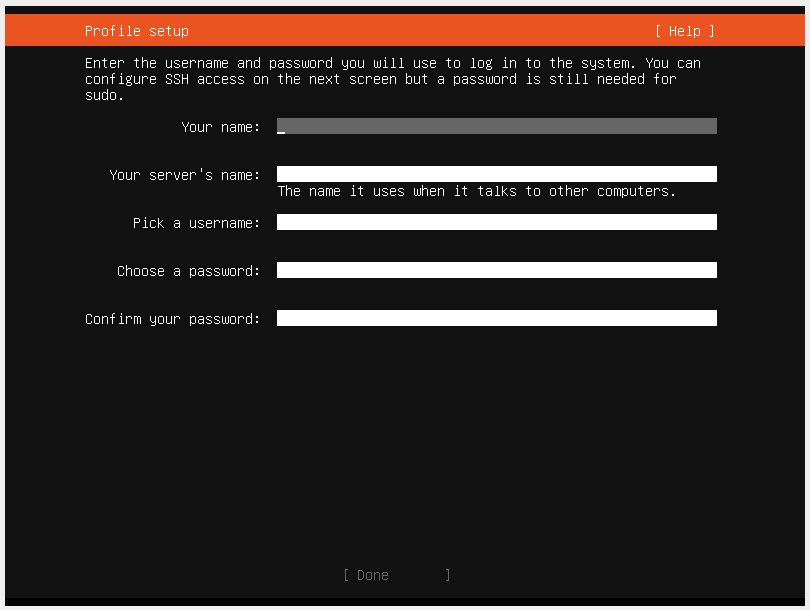
Profile setup
Enter the username and password you will use to log in to the system.
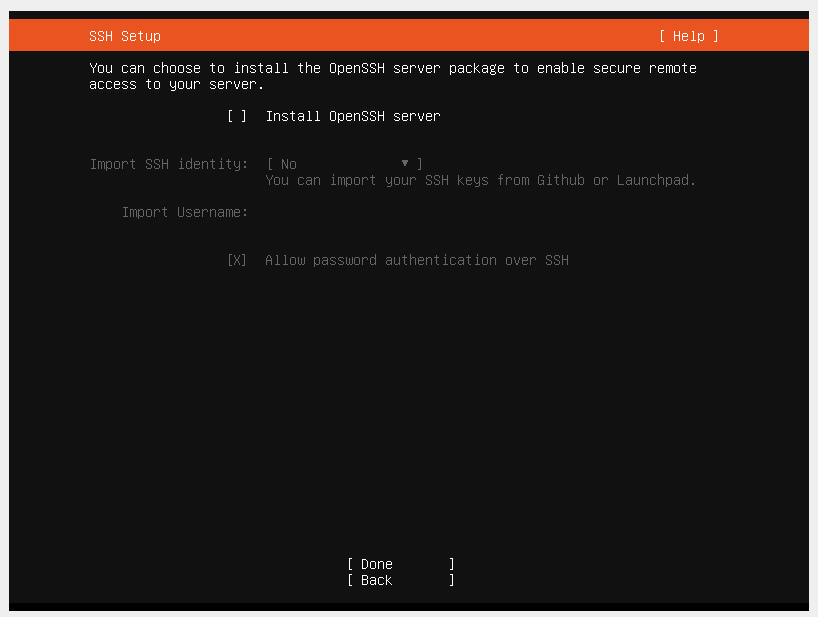
SSH Setup
Choose to Install the OpenSSH Server package to enable secure remote access.
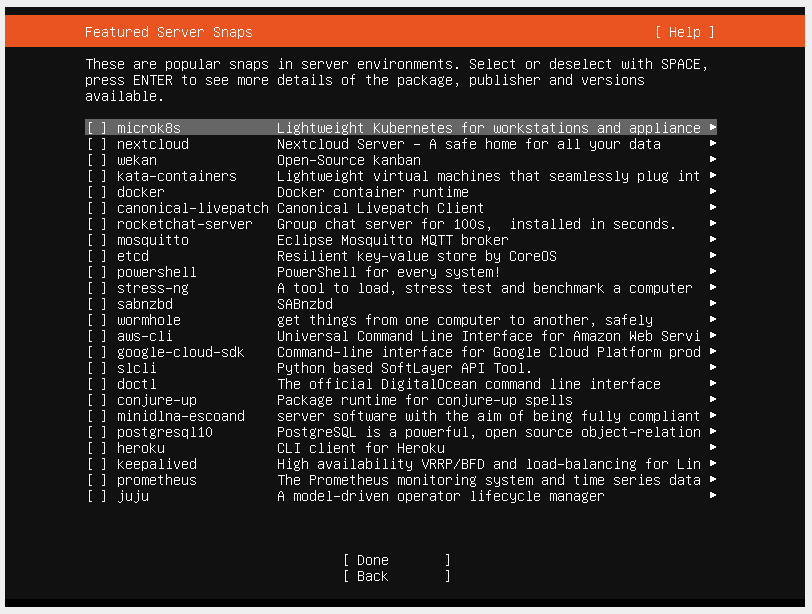
Featured server snaps
Below are all popular snaps in server environments. you can select or deselect with SPACE and press ENTER.
Installation start

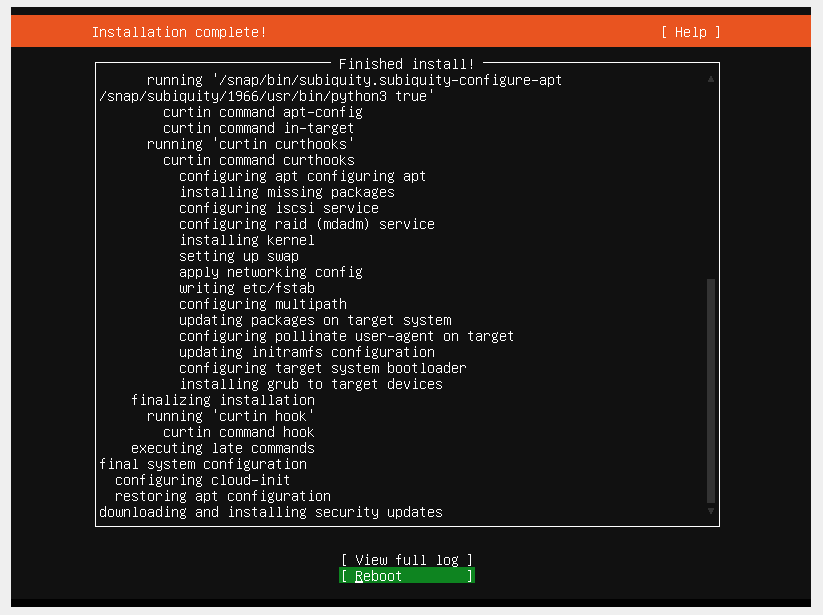
Installation complete
Now Installation is completes so click on the reboot button.
java 8 Install
Now install java 8 is java’s official site: https://help.ubuntu.com/community/Java
sudo apt install openjdk-8-jdkCheck whether the java version is installed or not installed below command use :
java -version
Install Jenkins
First, you need to add the package key to your Ubuntu packaging system. Import the GPG keys of the Jenkins repository.
wget -q -O - https://pkg.jenkins.io/debian/jenkins.io.key | sudo apt-key add -If the key has been successfully imported and packaged then the system will return OK. And add the Jenkins repository to the system with:
sudo sh -c 'echo deb http://pkg.jenkins.io/debian-stable binary/ > /etc/apt/sources.list.d/jenkins.list'Now update the apt-get package list and install the latest version of Jenkins.
sudo apt-get update
sudo apt-get install jenkins
Jenkins is now installed successfully on your Ubuntu server.
Check Jenkins status
systemctl status jenkins

=== OR ===

service jenkins status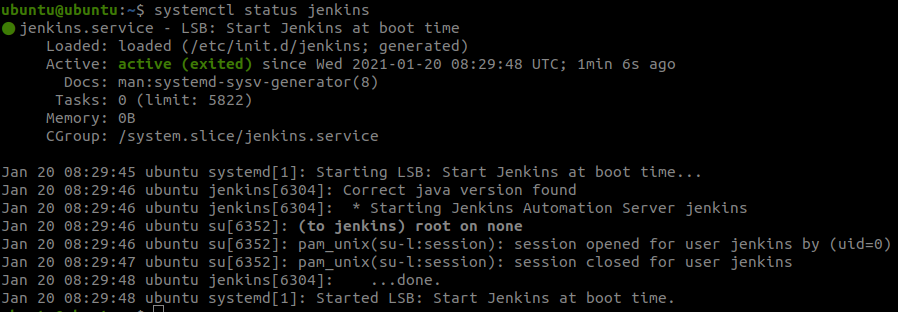
Setting Up Jenkins
Open your browser, type your domain or IP address Like http://ip_or_domain:8080 and follow the screenshot:
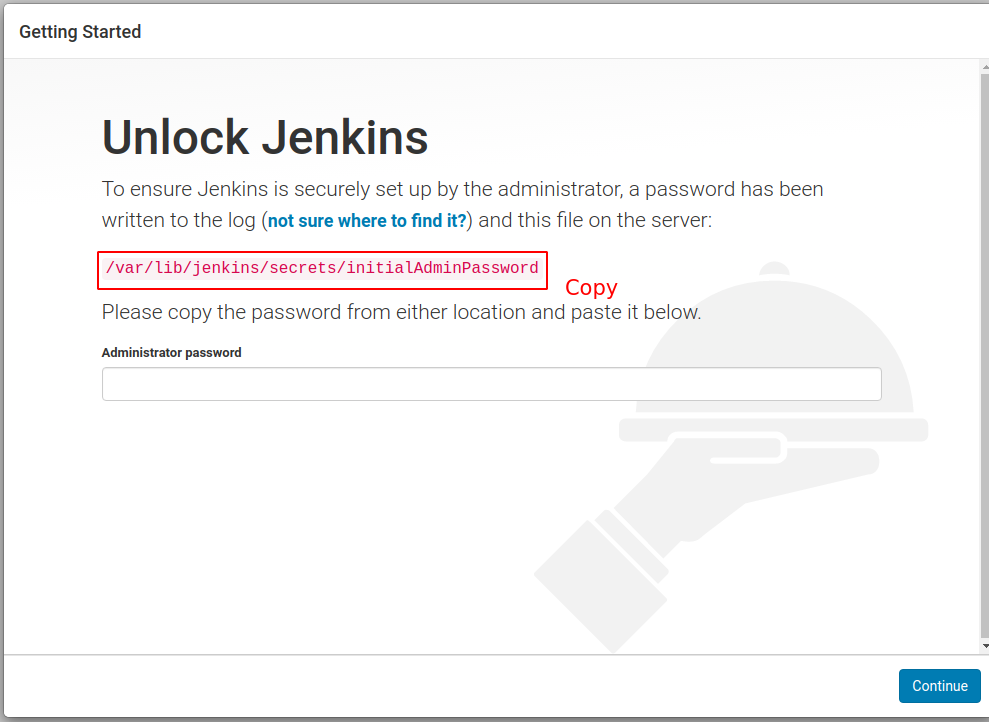
The Jenkins installer creates an initial 32-character alphanumeric password. Use the below command to print the password on your terminal:
sudo cat /var/lib/jenkins/secrets/initialAdminPassword

Output : d45ef8856bed4020bc318dfa9973a4jk
Copy the password and paste it into the Administrator password field and click on the right side corner Continue button. The next screen presents the option of installing suggested plugins or selecting specific plugins:
Customize Jenkins
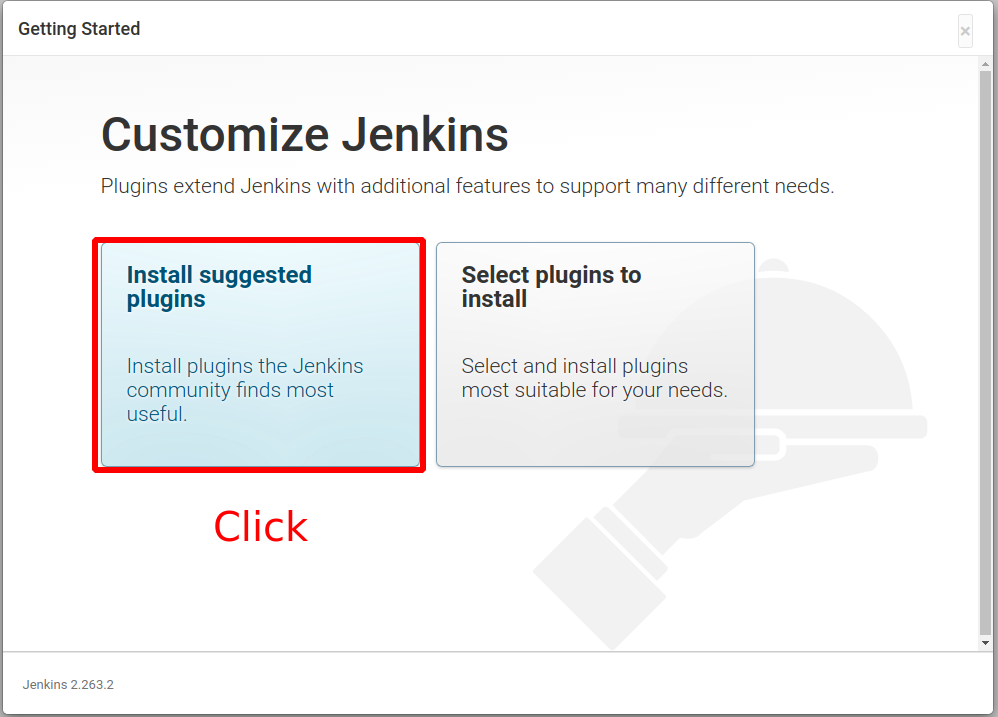
We’ll click the Install suggested plugins option, which will immediately begin the installation process start:
Getting started

When the installation is complete, you will be prompted to set up the first administrative user. you can possibly skip this step and continue as admin using the initial password we used above, but we will take a moment to create the user.
Create First Admin User
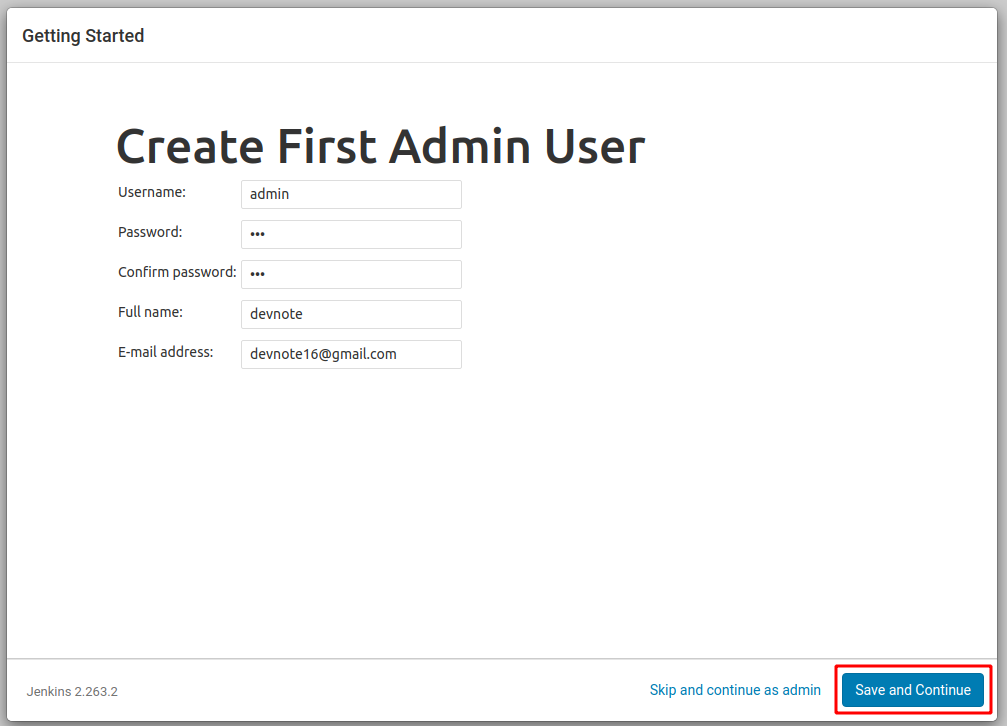
Once all plugins are installed, you will be set up with the Create First Admin User form. Fill out all fields and click on Save and Continue buttons.
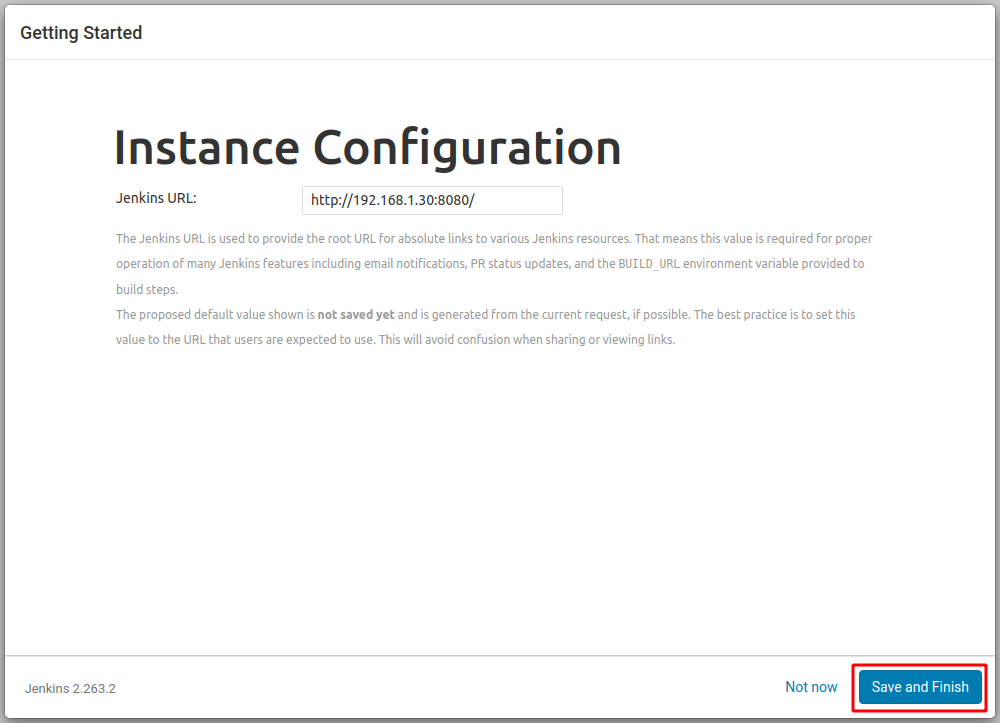
Instance Configuration
The next page will set the URL for your Jenkins instance. The field is an automatically generated URL. Confirm the URL by clicking on the Save and Finish button.
Jenkins is ready!
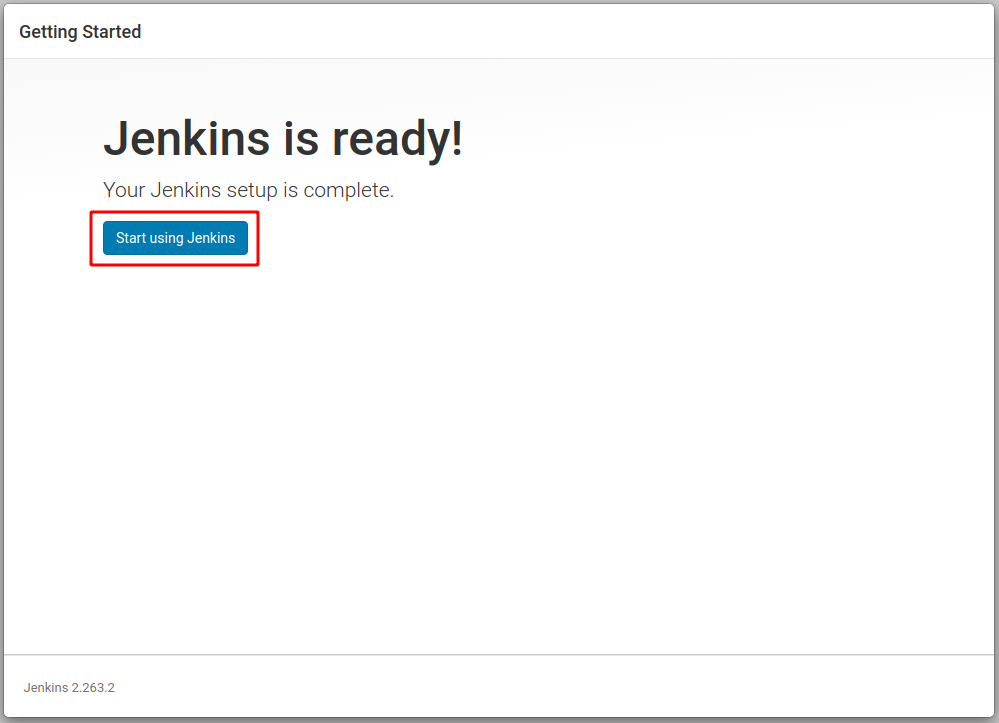
Click on the Start using Jenkins button. Now you will be redirected to the Jenkins dashboard logged.
Welcome to Jenkins!
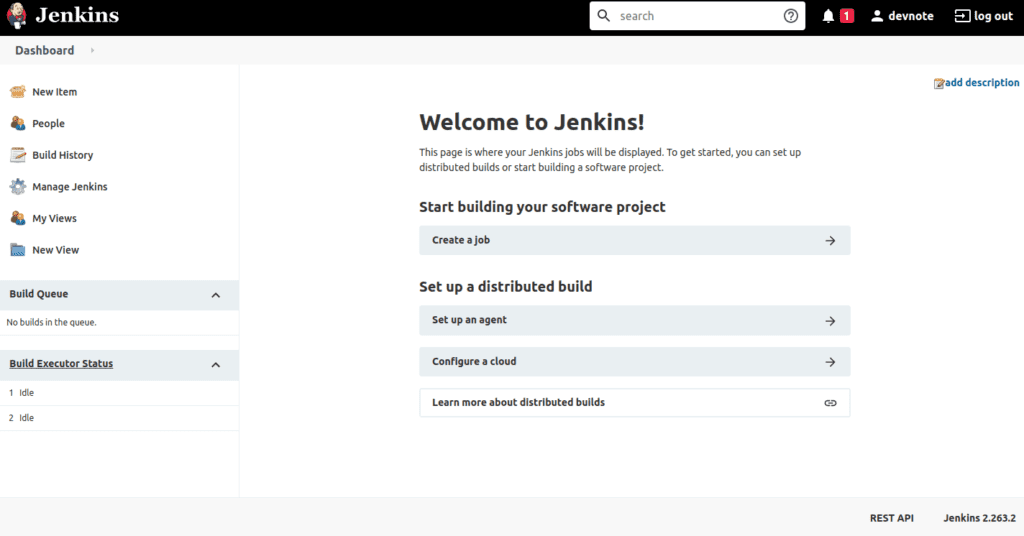
You have successfully installed Jenkins on your system.


