How to Set Up Google Authentication with Django
In this tutorial, we will read How to Set Up Google Authentication with Django. Today, I want to share about building user registration through Google OAuth(Open Authorization). OAuth uses websites or apps to share user information with other websites without being given a user’s password. Mostly use OAuth service providers are Google, Facebook, and GitHub. we are In this tutorial, registering users in a Django app using Google OAuth.
Install Django
Install the latest version of Django from PyPI.
$ pip install djangoCreate a new Django project using the below command.
$ django-admin startproject google_oauth .Create a new Django app using the below command.
$ python manage.py startapp google_oauth_appApply the database migrations using the below command:
$ python manage.py migrateRegister the app by adding it to INSTALLED_APPS in settings.py.
#google_oauth/settings.py

INSTALLED_APPS = [
    …
    'django.contrib.sites',
    'google_oauth_app',
]
Install django-allauth
To integrate Google OAuth using django-allauth.
$ pip install django-allauthNow register django-allauth by adding it to INSTALLED_APPS.
# google_oauth/settings.py

INSTALLED_APPS = [
    …
    'allauth',
    'allauth.account',
    'allauth.socialaccount',
    'allauth.socialaccount.providers.google',
]

# Insert at bottom
AUTHENTICATION_BACKENDS = [
    'django.contrib.auth.backends.ModelBackend',
    'allauth.account.auth_backends.AuthenticationBackend'
]

# Google as the OAuth provider
SOCIALACCOUNT_PROVIDERS = {
    'google': {
        'SCOPE': [
            'profile',
            'email',
        ],
        'AUTH_PARAMS': {
            'access_type': 'online',
        }
    }
}

# Add redirect users to the base route after a successfully login or logout.

LOGIN_REDIRECT_URL = '/'
LOGOUT_REDIRECT_URL = '/'
Create templates
Create new folder templates in your app base directory. And create a file index.html inside the templates folder.
$ mkdir templates
$ cd templates
$ touch index.html
#google_oauth_app/templates/index.html
{% load socialaccount %}
<html>
<head>
<title>Google Authentication with Django</title>
</head>
<body>
<h2>How to Set Up Google Authentication with Django</h2>
{% if user.is_authenticated %}
<p>Welcome, {{ user.username }} !</p>
<a target="_black" href="admin">admin</a>
<a href="{% url 'logout' %}">Logout</a>
{% else %}
{% if google_login %}
<a href="{% provider_login_url 'google' %}">Login with Google</a>
{% endif %}
{% endif %}
</body>
</html>
Now register this templates folder in the TEMPLATES configurations in settings.py file.
TEMPLATES = [
    {
        'BACKEND': 'django.template.backends.django.DjangoTemplates',
        'DIRS': [BASE_DIR / 'templates'],
        'APP_DIRS': True,
        ...
    }
]
Configure URLs
Open the app urls.py file.
#google_oauth_app/urls.py

from django.urls import path, include
from django.contrib.auth.views import LogoutView
from . import views

urlpatterns = [
    path('', views.index, name='google_login'),
    path('accounts/', include('allauth.urls')),
    path('logout', LogoutView.as_view(), name="logout"),
]
And open the project urls.py file and import app urls.
#google_oauth/urls.py

from django.urls import path, include

urlpatterns = [
    ...
    path('', include('google_oauth_app.urls')),
]
#google_oauth_app/views.py

from django.shortcuts import render

def index(request):
     return render(request, 'index.html')
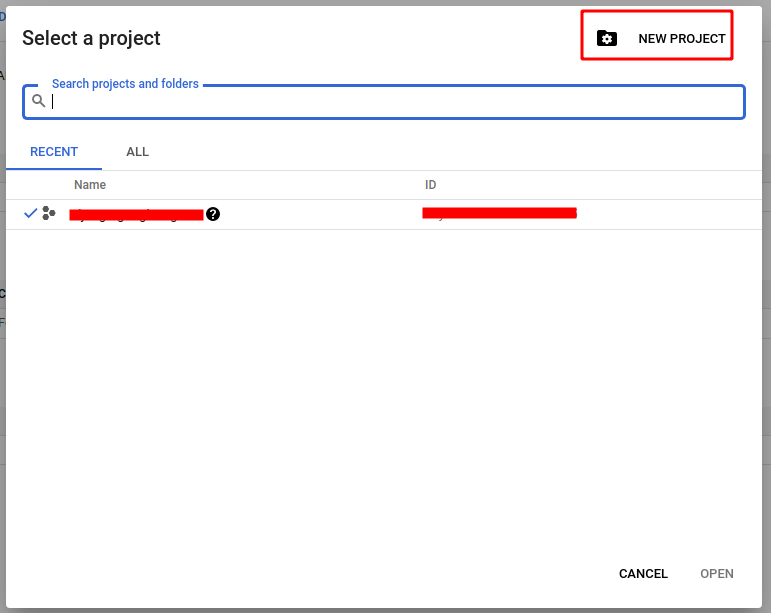
Create a new Google APIs project
We need to set up an OAuth application via Google Developer APIs Console.
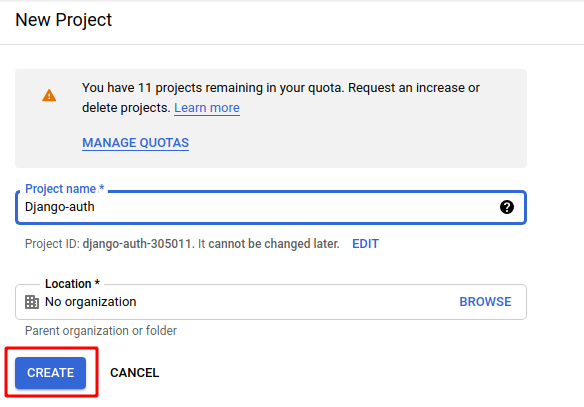
New project create
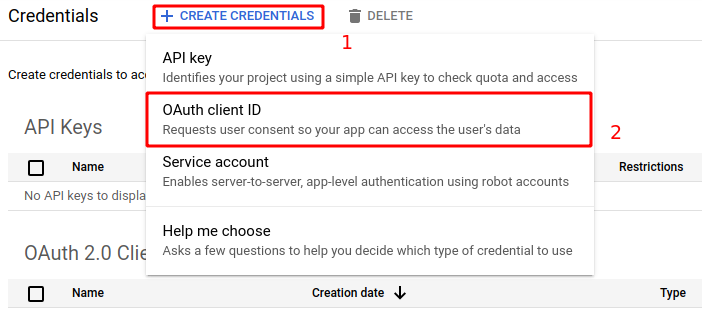
Add credentials. Click top the dropdown, choose OAuth Client ID option.
Authorized Redirects
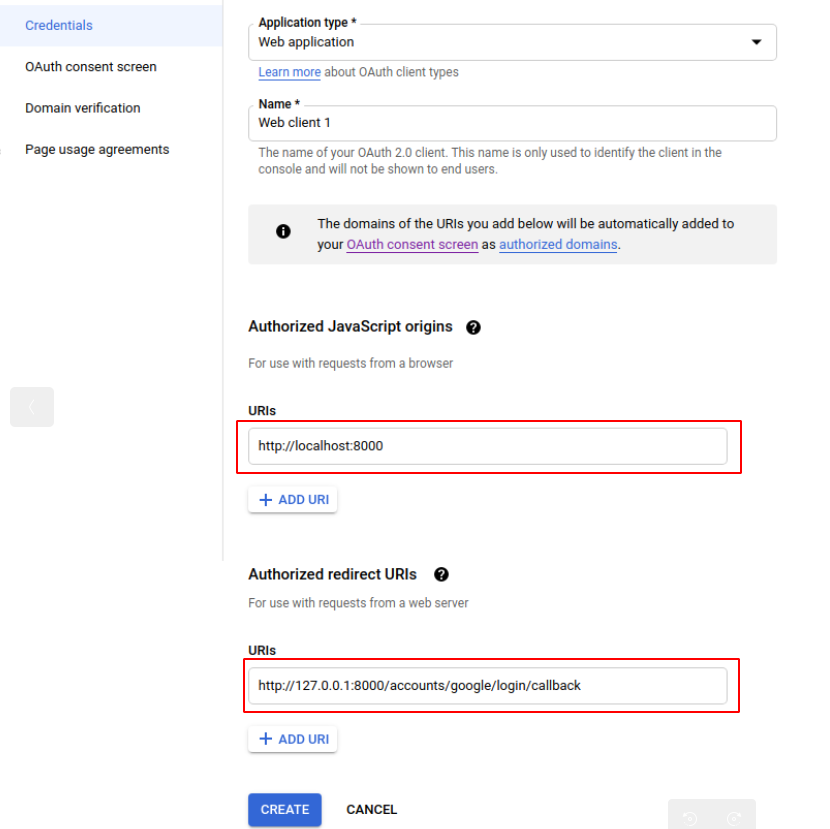
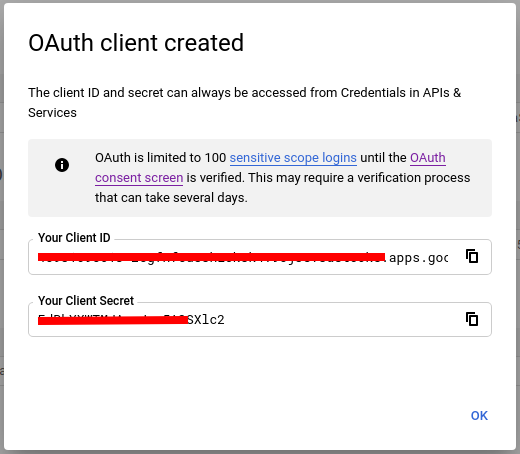
After a successfully OAuth create, copy Your Client ID and Client Secret.
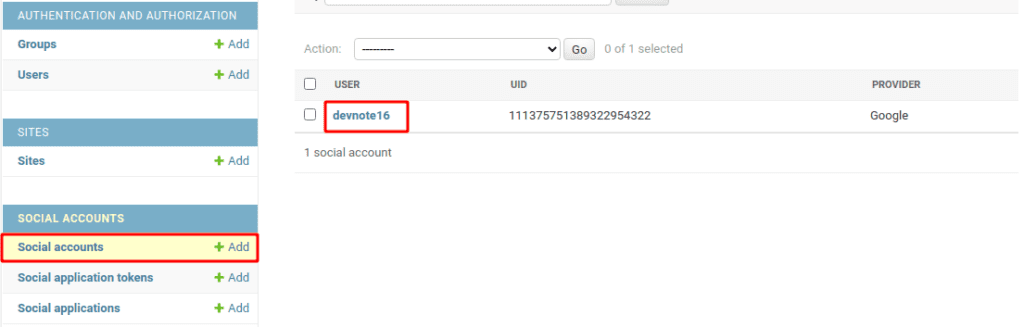
Add a social app
First, migrate the database using the below command:
$ python manage.py migrateMigrate is successfully created, now create a superuser.
$ python manage.py createsuperuserRun the app using the below command:
$ python manage.py runserverNow Open http://localhost:8000/admin and log in to Django Admin.
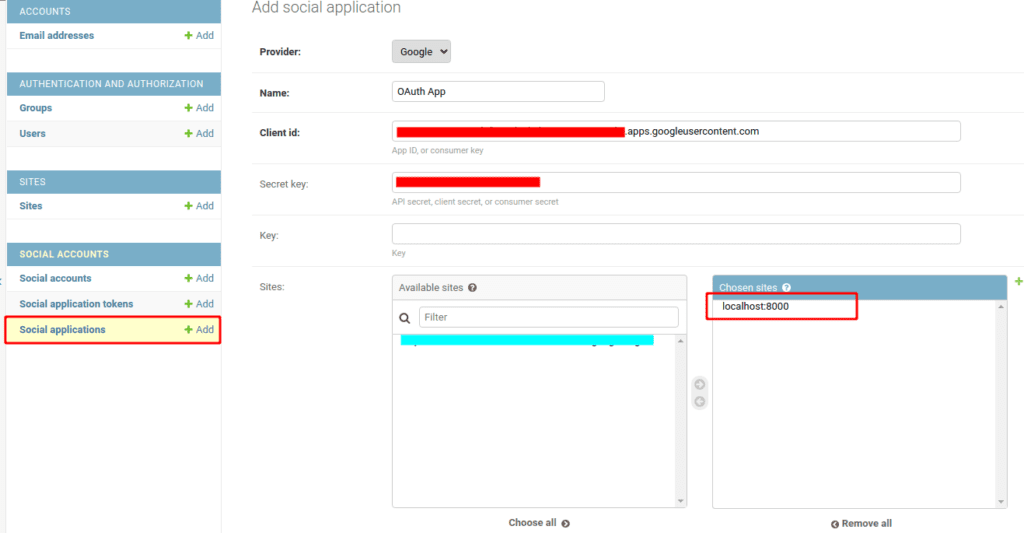
Now Social Applications click Add the details:
Now logout currently of the superuser, and log in again using your Google account.
If you get an error: SocialApp matching query does not exist at http://127.0.0.1:8000/accounts/google/login/, it means that the SITE_ID of the site you created in Django admin is not the same.
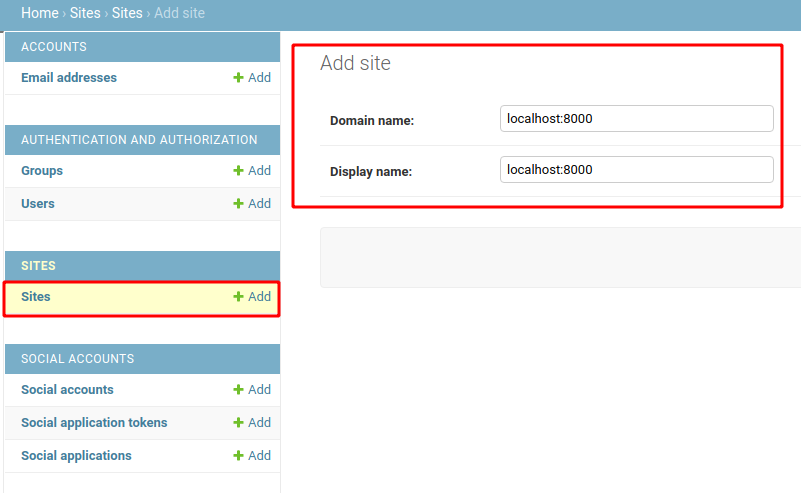
Get site id
$ python manage.py shell

from django.contrib.sites.models import Site
new_site = Site.objects.create(domain='localhost:8000', name='localhost:8000')
print(new_site.id)
Output: 2
#google_oauth/settings.py SITE_ID = 2
See the result
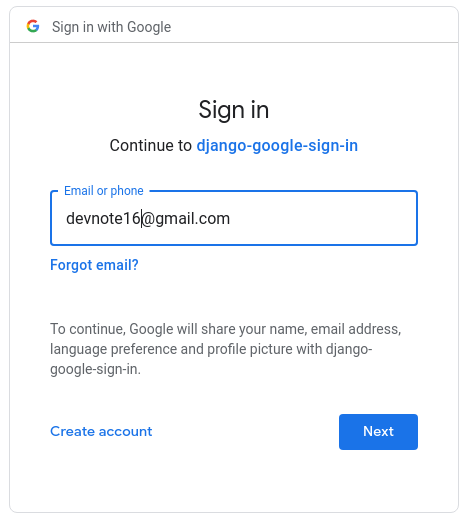
You are almost done! Now navigate to (http://127.0.0.1:8000/) to see the Login with Google.
After successful sign in with Google, you should be able to see your Google account name on the homepage look like the below screenshot:
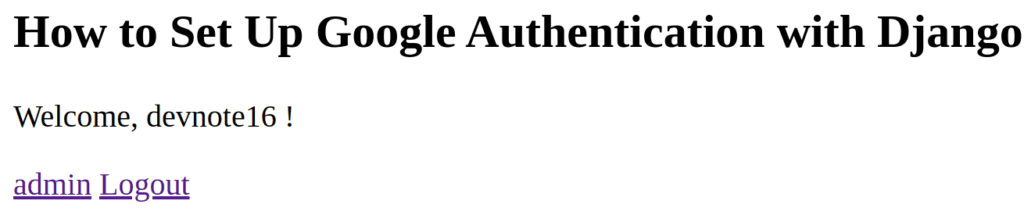
You can check the user information.